Chatbots are becoming increasingly popular as they offer businesses a convenient and cost-effective way to engage with their customers. Integrating a chatbot onto your webpage can enhance user experience and improve your customer service by providing round-the-clock support.
In this article, we will explore the steps to connect a chatbot to your webpage and some best practices to make the most out of your chatbot. We will also introduce you to the easiest way you can connect a TruVISIBILITY chatbot to your website.

Table of Contents
Steps to Adding a Chatbot to Your Website
Connecting a chatbot to your website is not complicated. In fact, there are many simple (and fun!) steps involved with adding your first chatbot to each page on your site.
Step 1: Choose Your Chatbot Platform
The first step in connecting a chatbot to your webpage is to choose a chatbot platform that fits your needs. There are several popular chatbot platforms available, including Dialogflow, IBM Watson, and, of course, TruVISIBILITY, which is a free platform to create a chatbot for an entire website.
Step 2: Design Your Chatbot
Once you have chosen your chatbot platform, the next step is to design your chatbot. The design process involves defining the chatbot's purpose, creating a conversation flow, and writing dialogues for the chatbot.
Define Your Chatbot's Purpose
Before designing your chatbot, you need to define its purpose. What problems will your chatbot solve? What services will it provide? Understanding the purpose of your chatbot will help you create a conversation flow that aligns with your goals.
Create a Conversation Flow
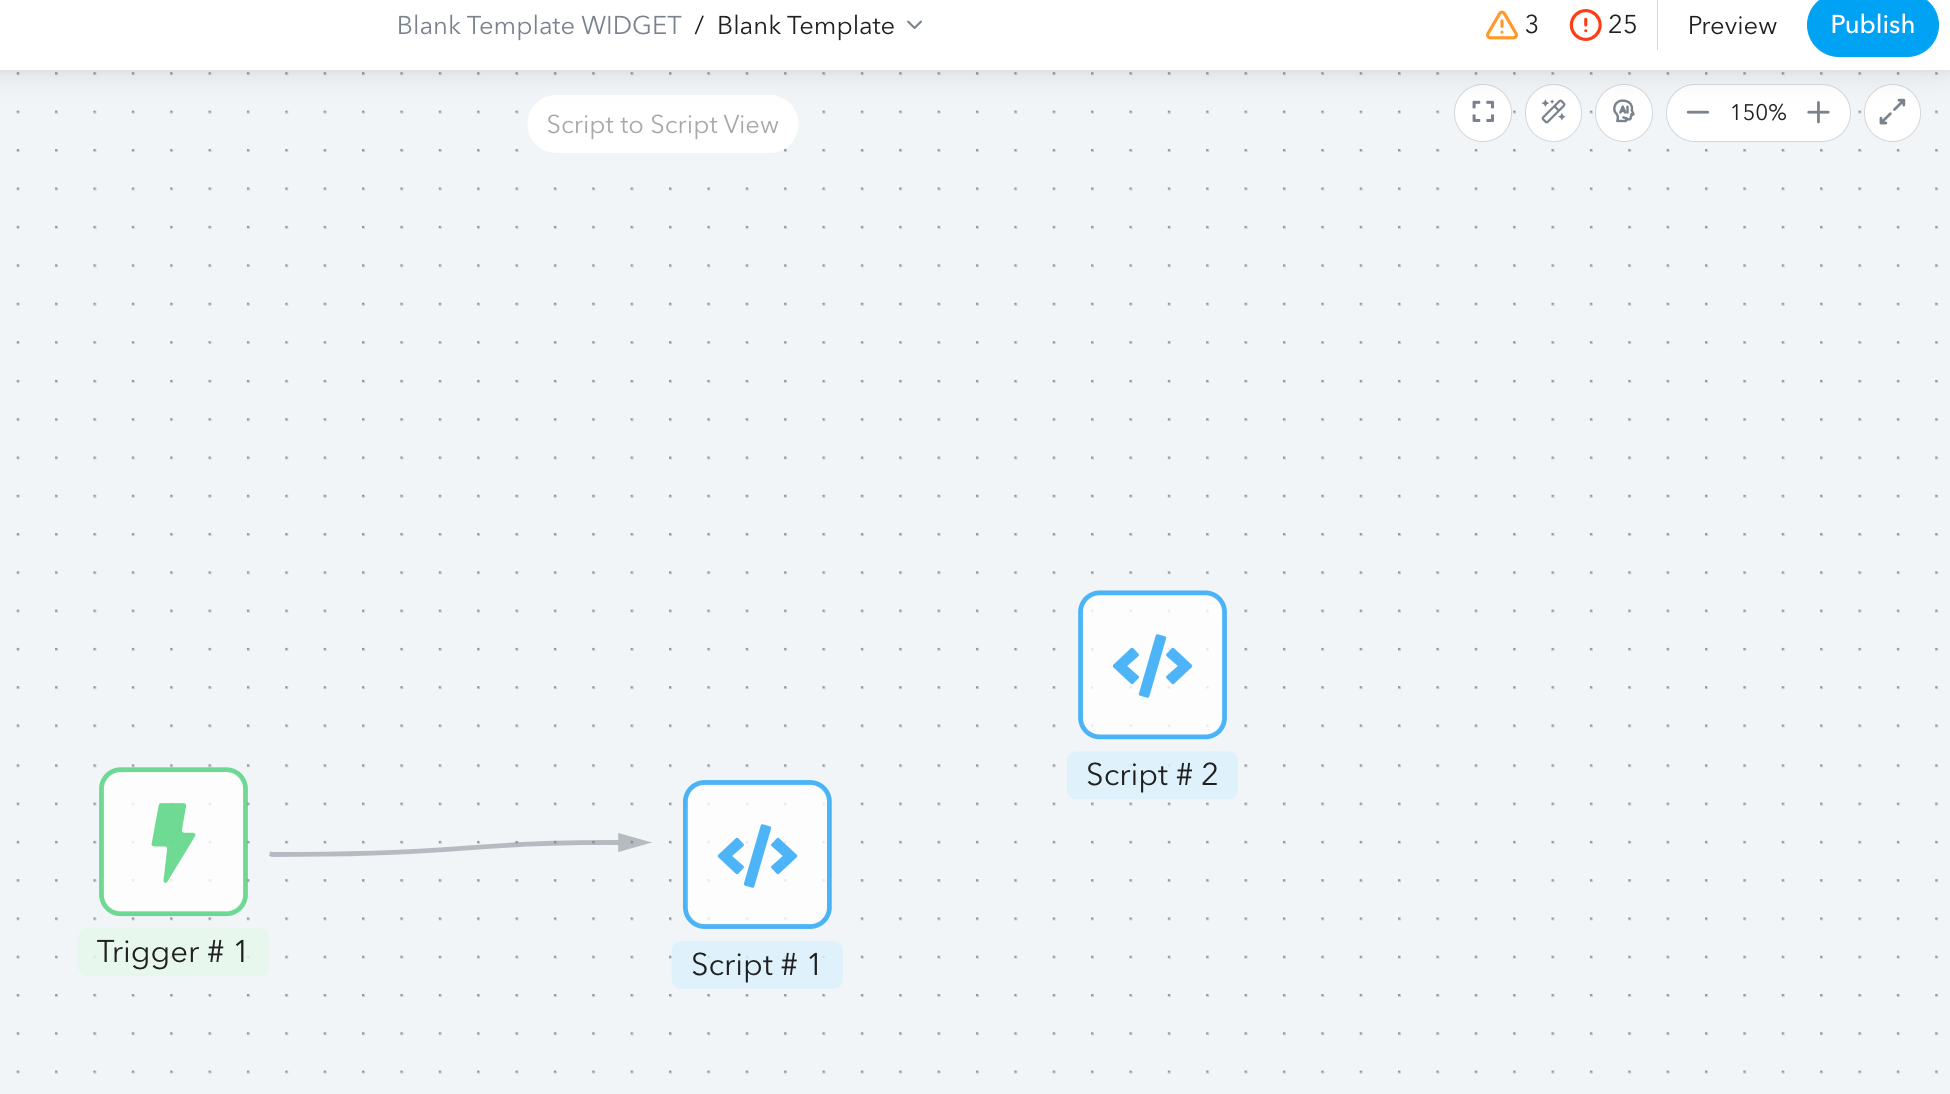
A conversation flow is a visual representation of the chatbot's interaction with the user. It outlines the different paths the conversation can take and the actions the chatbot can perform. A conversation flow should be simple, easy to follow, and provide users with a seamless experience.
Write Dialogues
The final step in designing your chatbot is to write dialogues for the chatbot. The dialogues should be natural and conversational, and the chatbot should be able to understand and respond appropriately to user queries.
Step 3: Integrate the Chatbot with Your Webpage
Once you have designed your chatbot, the next step is to integrate it with your webpage. This process involves creating a webhook and configuring your chatbot's settings.
Configure Your Chatbot's Setting
After creating a webhook, you need to configure your chatbot's settings. This involves defining the chatbot's name, appearance, and language.
Step 4: Test Your Chatbot
The final step in connecting your chatbot to your webpage is to test it. Testing your chatbot involves checking its functionality, ensuring that it can understand and respond to user queries, and identifying any errors or bugs.
To test your chatbot, you can use the chat widget on your webpage or the chatbot platform's testing tools. Testing your chatbot is an iterative process, and you should continue to refine your chatbot's design and settings based on user feedback and data analysis.
Best Practices for Chatbot Integration
Integrating a chatbot onto your webpage requires careful planning and execution to ensure that it delivers a positive user experience. Here are the steps to adding a TruVISIBILITY chatbot to your webpage.
Choose a Chatbot Template
What is great about TruVISIBILITY’s Chat app is the various chatbot template choices. You can decide to have a chatbot that simply answers frequently asked questions or hire live agents to give site visitors the ultimate support.
Design the Chatbot Conversation and Look
After choosing to go with a template or designing a bot from scratch, you can choose which widgets to include, such as a survey, what conversational responses the bot should have, the colors and borders of the bot, and so much more.

Select the Channel to Connect Your Bot To
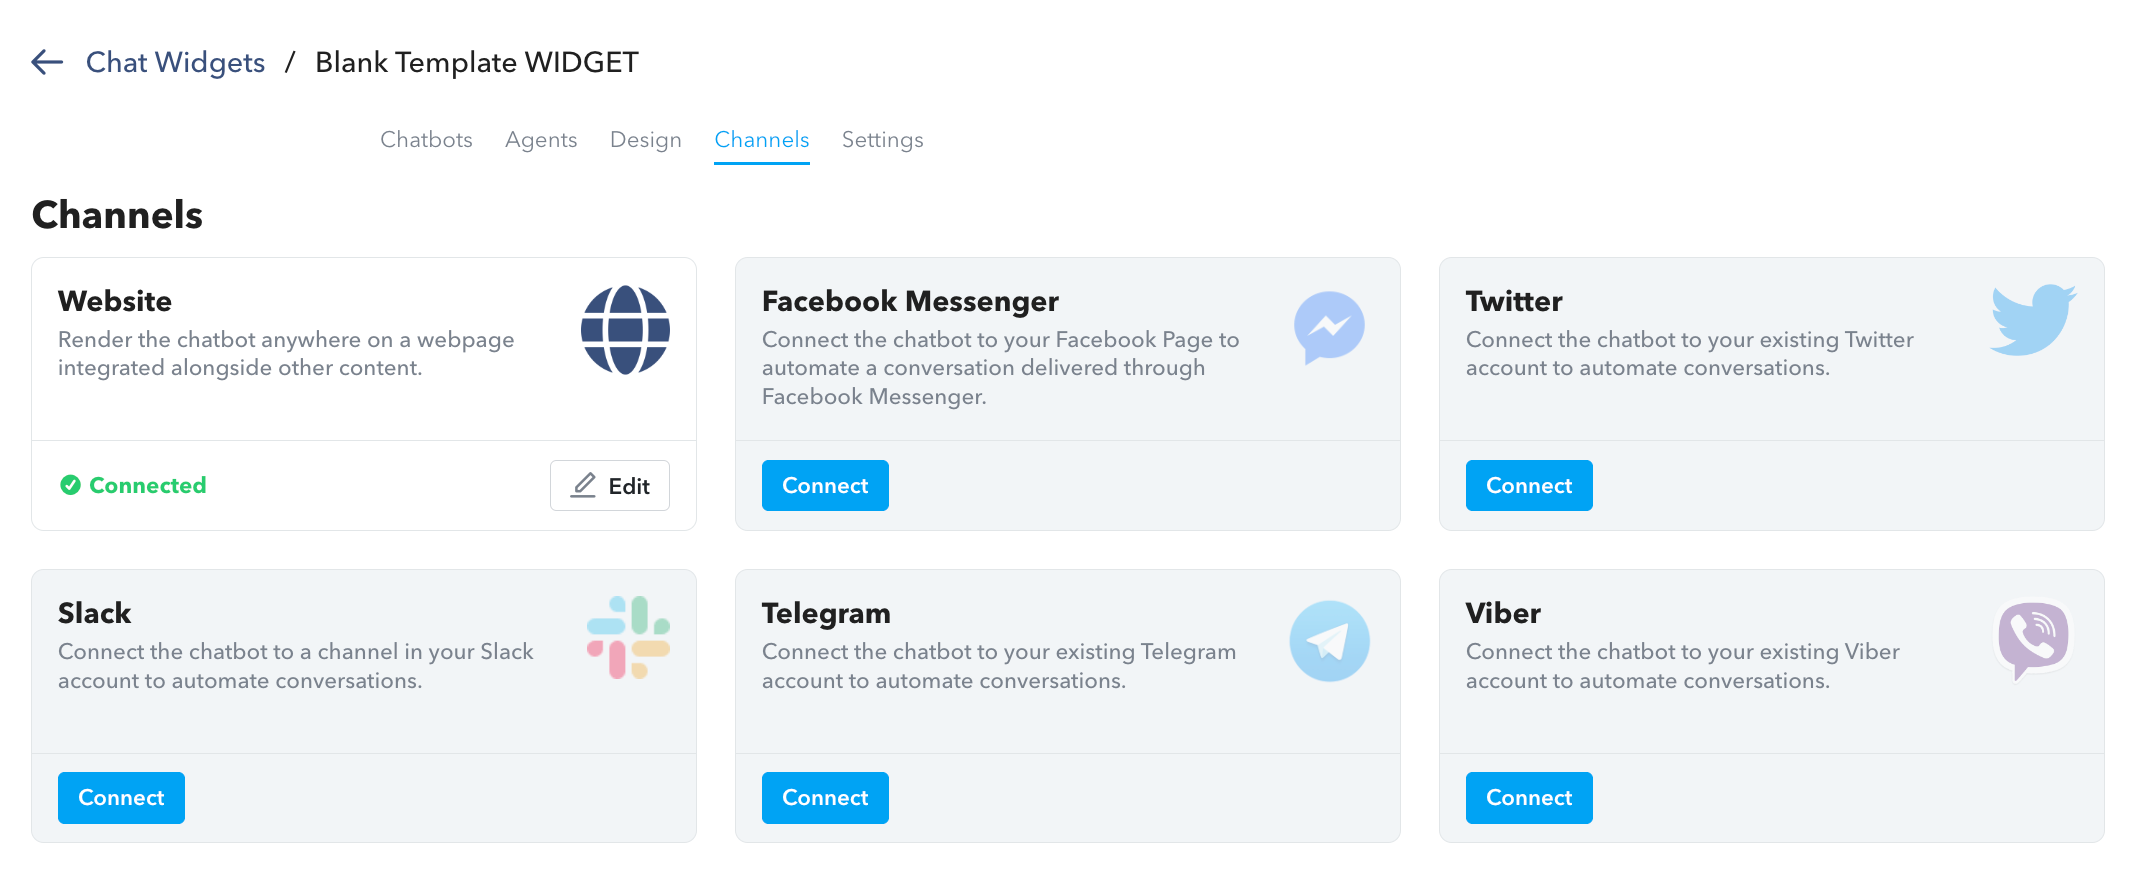
You can select the ‘Channel’ tab to connect your bot to a site, Facebook Messenger, Twitter, and more options. If you don’t have a website already made, no problem! You can select the bot you made at any time and connect it whenever you want to connect it to your site!

Simply have your website information, such as the popup code, to copy and paste as seen in the image below. Remember to add your chatbot to each page of your website.
Conclusion
TruVISIBILITY’s Chat application can be connected to most websites, especially if you create your website through TruVISIBILITY’s Sites application. In this article, you learned the basics of how to start a chatbot and connect it to any webpage.
But did you know that chatbots can be connected to more than just your business website? You can add chatbots to automatically handle customer service on your business social channels and landing pages as well. If you want to learn how to connect forms in a chatbot or how to create a bot with live agents, view our support page articles about the Chat app here.
Want to receive more articles?
Sign-up for our weekly newsletter to receive info that will help your business grow


